
I love to garden. Today is June 1, 2019, and our little burg of Seabrook is coming alive with beautiful lush summer greenery and flowers. This in a gorgeous beach town setting. Just. Wow. It took me a few hours to get our drip irrigation system back online, since each Fall I remove my automatic watering timers and take them in to my warmish shop for the colder, wetter months to extend their usefulness. And for the last couple of days I have been helping a neighbor repair and add some additional drip to her yard. Thought I would finally write a little piece about drip irrigation.
I became interested in drip irrigation about 35 years ago when I saw a display at a hardware store and honestly I thought, holy crap I gotta buy some stock in this! Drip Irrigation is a type of micro-irrigation system that has the potential to save water and nutrients by allowing water to drip slowly to the roots of plants, either from above the soil surface or buried below the surface. The goal is to place water directly to the root zone and minimize evaporation. No brainer! So I bought some parts (so few were available in the early days of drip!), and I have been a big proponent of drip (and drip timers!) ever since.
When I was 35, I was in full swing as a bakery retailer. During those years I operated my "Richard's Bakery" of Tualatin, Oregon, and later, "Favourites Bakery" in Portland. But having been interested in gardening since I was a child, I spent what little free time I had building a pretty yard and garden. Some folk jus' get the bug! However, rising at 3 or 4 a.m. and running a store that involves both manufacturing and sales is a big task. "Dammit!" I may have been heard to mutter as I got into my car to go to work, having noticed the drooping azaleas or bedding plants. "I didn't water again yesterday!!!" Sound familiar? So when drip irrigation came along, whereby I could set a timer to go off in the middle of the night and discreetly and accurately water all my plants, I was immediately all in! Now, for 35 years I have been adding drip to my house, my business, and since about 2005, helping other folks also get set up to enjoy this easy and effective plant watering method. Whether you have plants in the ground or even a complicated line-up of pots, window boxes or some other type of planter, there is a way to get water to them automatically and consistently.
I won't lie to you. Drip irrigating your yard or garden can be complicated. At this point, I have the advantage of oh so many years of getting to know all the available parts. First, I read up on everything about drip. I watched videos. I spent an inordinate amount of time over the years in knee pads slithering through crocosmia and lilacs, (oh yeah get some soft lightweight knee pads!), and then, I stood in front of those little boxes full of drip parts at Home Depot and figured out how every one single of them is used. And then I used them. So glad I learned this stuff. My yards and gardens have flourished brilliantly because of it. I think I may have even gotten a little more money for my commercial building because I had gardened the hell out of it and it looked great! My best advice is to check out a bunch of YouTube videos about drip before you begin.

When we gardened our commercial building
GETTING STARTED:
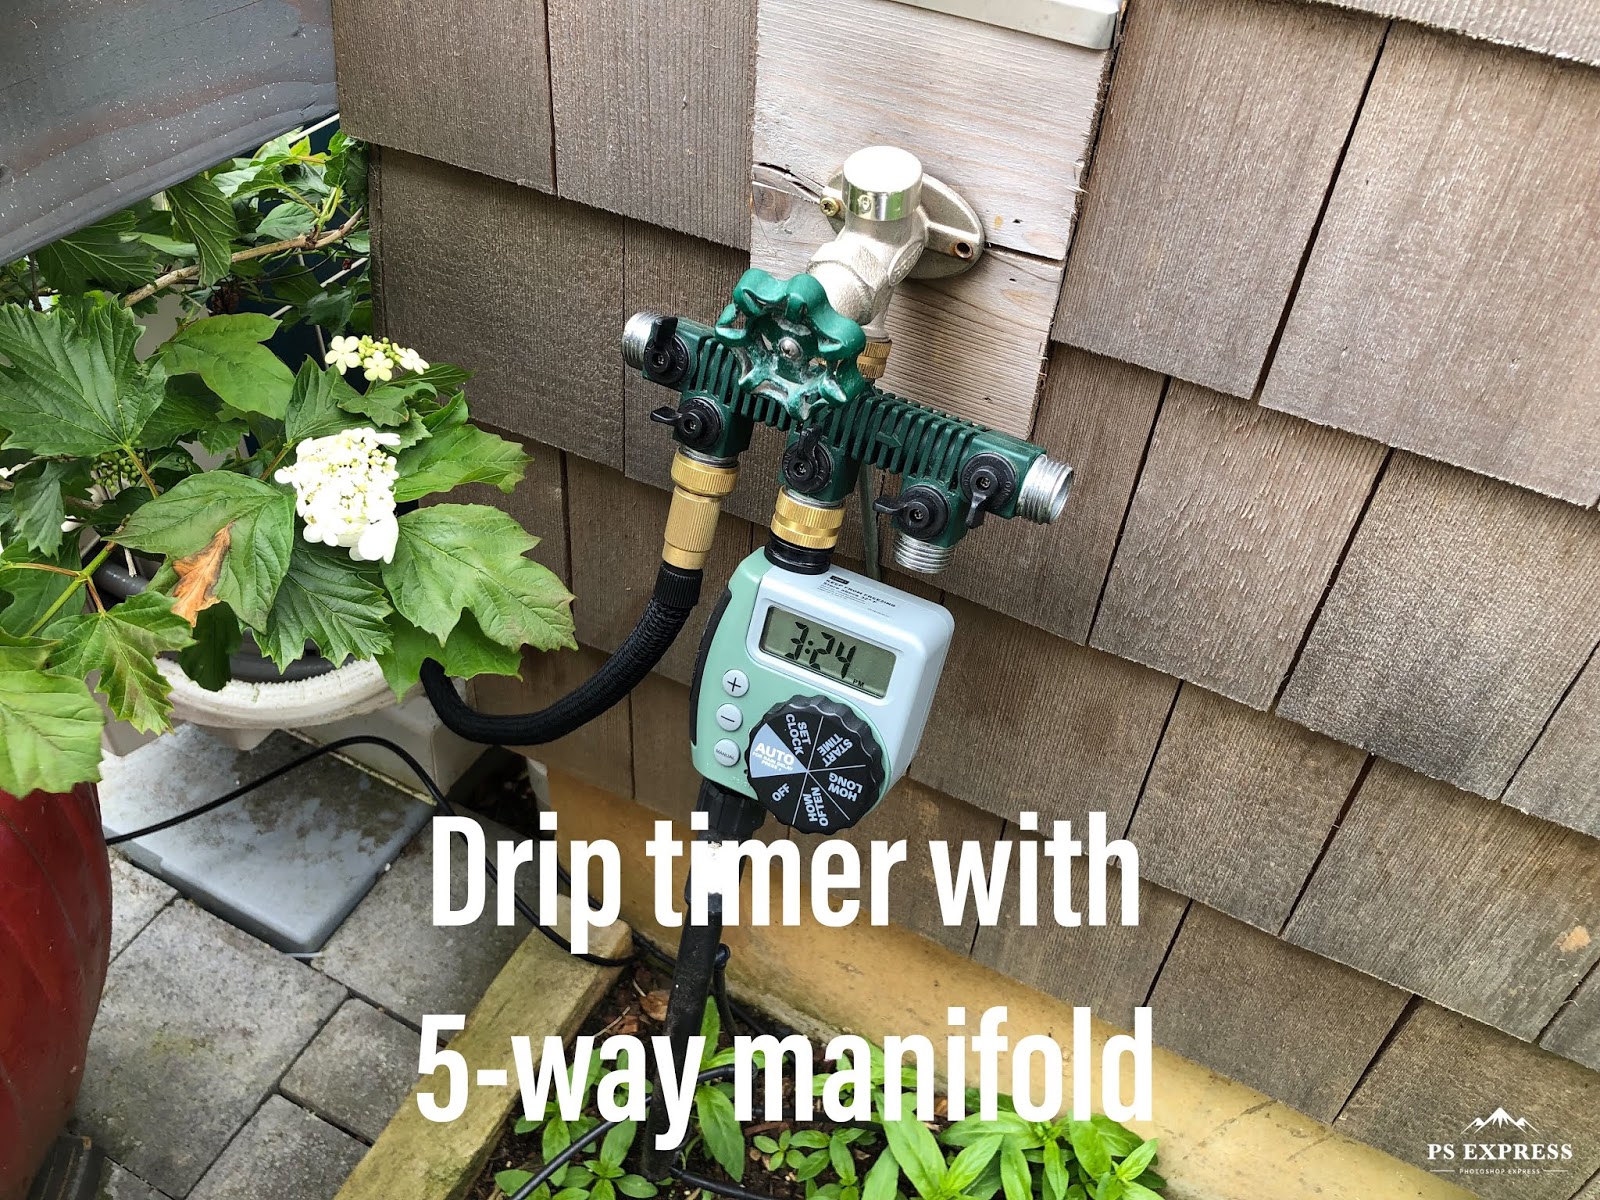
First, take a look at your yard and consider where your water sources are around your home. Most homes have at least one outdoor spigot or "hose bib". Analyze how you might run a 1/2" drip tube through your yard such that it passes by your trees and shrubs. Attach your 1/2" drip hose to your drip timer as shown with a hose threaded plastic adapter. Push and rock your 1/2" drip tubing into the adapter about 3/4".


The best way to get your 1/2" drip into the yard to make it useful is to start with a regular 1/2" drip
line, usually black. Weave it into the yard, and then attach it to an emitter style tube, like the tan
one here. It has built in drip emitters every 16". As you continue to weave the tan drip emitting tubing through the yard, you will likely be able to pick up some shrubs along the way as you will notice that you can weave it such that some plants will benefit from the built in emitters. When you like where you've got it, and have found place to end it, use a 1/2" "endie" to close it off at the end. Great start!
KEEP GOING!!!
Moving forward you will just want to find a way to water each and every plant in your yard or garden. Using all of the different drippers and barbs, even sprayers, run either more of your 1/2" dripper tubing, or puncture your 1/2" tubing and then add some 1/4" tubing to find your way to each plant. In time you'll get good at knowing which fittings and drippers to use. Also, sneak your way into pots and planters in a similar way. Just keep moving. You'll make some mistakes. Your best bet is to really familiarize yourself with all the available parts and what they are meant for first. I encourage you to stand in front of the drip parts at Home Depot or some larger store and get to know the parts.


 |
| 1/4" barbs |
 |
| 1/4" and 1/2" flow regulators |
 |
| "On-line" and "In-line" drippers |
 |
| In-line" dripper |
 |
| On-line dripper |
My last piece of important advice before you go on your merry way and get this drip thing on your resume is to use a long fire lighter to slightly warm your 1/4" line before you add barbs or emitters. Way easier! Pictured above!
I am gonna stop right here because fo reals you will need to do some research beyond my tract! Type drip irrigation into your browser and give it an evening. It's so worth it. My vintage nasturtiums in that window box on my man cave are already going crazy cuz they get proper water and basically all I do is stand back and watch them get full and beautiful and hanging over the basket. It's at these times that I thank The Gods of Drip Irrigation! Happy to answer any questions. Text 503-887-0111. Ric

No comments:
Post a Comment